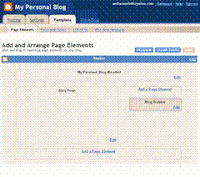
This is a step-by-step guide for:
A) Getting an Account with Blogger.com and making blogs.
B) Getting and Account with Adsense and adding Adsense to your blog.
1) Go to http://www.blogger.com/ .On the bottom-right of the page there is an orange color arrow stating “Create Your Blog Now”. Click on it.
.gif)
2) Fill Up the small registration form and click on “Continue”.
.gif)
3) You are Ready to make a blog now. Blogger will now ask you to “Name Your Blog”. Fill in your desired blog name and click on “Continue”.
.gif)
4) Now Blogger will ask you to choose a template/layout for your Blog. Choose a template that appeals to your eyes and click on “Continue”.
.gif)
5) Your blog has been created. Click on “Start Posting”.
.gif)
6) Give a Title to your Post and in the Compose Box type a Paragraph/Article on any topic. Then click on “Publish Post”.
.gif)
7) You will be informed by Blogger that your Post has been Published. You will also be given the following options:
i) View the Blog
ii) Edit Post
iii) Create a New Post
.gif)
A one page article focusing on a particular topic is good enough to add Adsense to your Blog. But it is always advisable to add some more content to your blog because Adsense Robot goes through your content to determine what your site is all about so that it could serve relevant advertisements on your site. Hence I would advice you to Create a few more New Posts before adding Adsense. Otherwise you can straight away add Adsense to your blog and add more content to your blog later on.
How to add Google Adsense to your Blog
1) Once you have published a post you will be taken to the following page. Just below the Title of your blog there is an option called “Template” click on it.
.gif)
2) You will be taken to the Page Elements section of your Template. Click on “Add a Page Element” on the Sidebar.
.gif)
3) A new Window will open with the title “Choose a New Page Element”. Go to the “Adsense” section and click on “Add to Blog”.
.gif)
4) You will be asked to “Sign Up for Adsense Account”. Fill in your Email Address and Language and click on “Create Account”.
.gif)
5) Adsense will send an E-mail to your e-mail address asking you to confirm your membership by clicking a link. Click on that link, you will be taken to a form, fill it up and you will be given an Adsense Account .
.gif)
6) Go back to your Blogger Window and click on “Continue”. Now you will be taken to the “Configure Adsense” section where you can choose the Format (Size and dimensions of your Advertisement block) and Colour combination of your adds.
.gif)
7) In the Format menu choose “120 x 600 Vertical Banner” and also choose colors of your choice. Finally click on “Save Changes”. Adsense has been added to your blog. Go back to “Page Elements” section of template and you will see a new “Adsense” block in your Sidebar.
.gif)
8) Click on “View Blog” to check out your Blog and the Advertisements placed by Adsense.
No comments:
Post a Comment